Let's Start Step-1 [ Adding CSS ]
The First thing you need to do is to login into your Blogger account and go to > T> Edit HTML and search for the ending ]]></b:skin> tag and just above it paste the following code.
Step-2 [ Adding HTML Script ]
Now, this is the most essential part of the tutorial and you have to do it very carefully. In the template, search for the </body> tag, and just above it paste the following HTML Coding.
Now, Save your template.
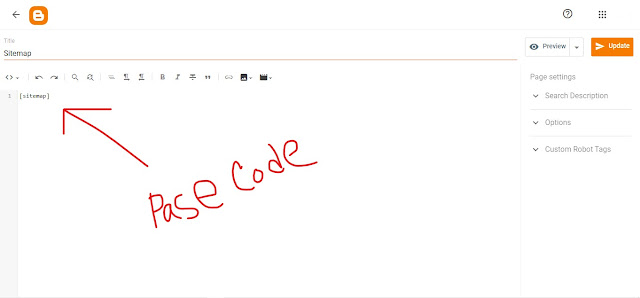
Step-3 Most Important - ( Add Sitemap In Pages )
Now, Go to your blogger dashboard > Pages > Add New Page.
Copy Code,
[sitemap]
Take a good look at how to paste the sitemap code.
Now, click on the publish button and see your sitemap page 😍
Congratulations !! You've done it. Now you have learned How to Add a Site Map Widget to Blogspot Blogs. Visit your blog and check out the fun widget that works, I hope you enjoyed this tutorial if you enjoyed it please share it with your friends, we are working hard to develop some amazing widgets so please stay tuned with us.


![How to Add Professional Sitemap Widget In Blogspot Blogs [Hiddne Trick]](https://blogger.googleusercontent.com/img/a/AVvXsEj0b6JdpzA5Dlv4_VjSSJGiqSemA6aL7_J87aLbBEiuxE5UVwRk7it_IrrDu9FCxPx0c3A21nhccqeQnQjopP6JEnRcP5IUQgqunBIHVSbdm_uV_5Y-t83A4XhczW09_DXF8n0N5VeXD0Q-3zZgA0hx6p1MarCEt247pWuTdKiXxZtQ2am9sJu_qel0=w100)

1 Comments
It's very nice, but some tags are not included in the accordion menu. I thought it was a problem too, but you have the same problem ☹
ReplyDeletehttps://www.hizliresim.com/bg60hw1